Birthday cake designs don’t have to be complicated to look amazing. With a few smart techniques and the right tools, you can turn a simple cake into a showstopper that matches any theme or personality. Whether you’re baking from scratch or dressing up a store-bought cake, these ideas will help you get a polished, party-ready look.
Think bright colors, clean edges, and playful details that guests will love. Ready to make a cake that looks as good as it tastes?
What Makes This Special
Great birthday cake design is about balance: simple techniques that deliver high-impact results. You don’t need art school skills or pricey gear.
A handful of practical tools, smart color choices, and a plan can take you far. The designs here are flexible, family-friendly, and easy to customize for kids, teens, or adults.
Ingredients
- Cake layers: Your favorite vanilla, chocolate, funfetti, or red velvet (two or three 8-inch rounds)
- Simple syrup (optional): 1/2 cup water + 1/2 cup sugar for moistening layers
- Buttercream frosting:
- 1 cup (2 sticks) unsalted butter, room temperature
- 3–4 cups powdered sugar, sifted
- 2–3 tablespoons heavy cream or milk
- 1–2 teaspoons vanilla extract
- Pinch of salt
- Food coloring: Gel or oil-based colors for vibrant shades
- Fillings (optional): Jam, lemon curd, chocolate ganache, or crushed cookies
- Decorations: Sprinkles, edible glitter, candy, macarons, fresh fruit, or chocolate shards
- Fondant (optional): For smooth finishes, cut-outs, or toppers
How to Make It
- Bake and cool your cake layers. Level the tops with a serrated knife so they stack evenly. Chill the layers for 30 minutes to make them easier to handle.
- Make the buttercream. Beat butter until fluffy, then add powdered sugar, salt, vanilla, and cream until smooth and spreadable.
Tint portions with gel color as needed.
- Prep the board and tools. Place a non-slip pad under your cake board. Have an offset spatula, bench scraper, and piping bags ready.
- Stack with filling. Brush layers with simple syrup if desired. Add a thin buttercream dam around the edge, fill the center, and place the next layer on top.
Repeat.
- Apply a crumb coat. Spread a thin layer of frosting over the entire cake to trap crumbs. Chill 15–20 minutes until set.
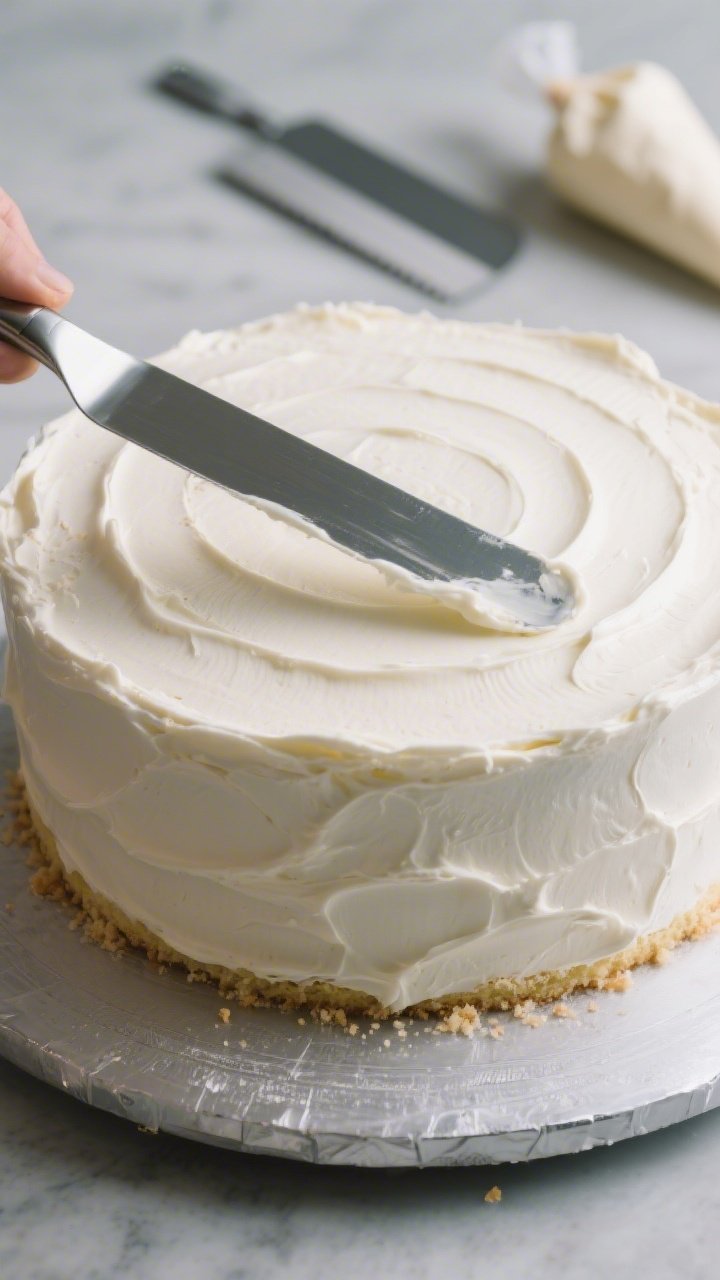
- Frost the final coat. Add a thicker layer of buttercream. Use a bench scraper to smooth the sides and an offset spatula for the top.
Chill again for neat edges.
- Add your design. Choose one of the easy styles below:
- Sprinkle halo: Press sprinkles around the base or as a band around the center.
- Textured swirls: Use the back of a spoon to create soft waves in the frosting.
- Ombre finish: Apply two or three shades from dark at the bottom to light at the top, then blend with a scraper.
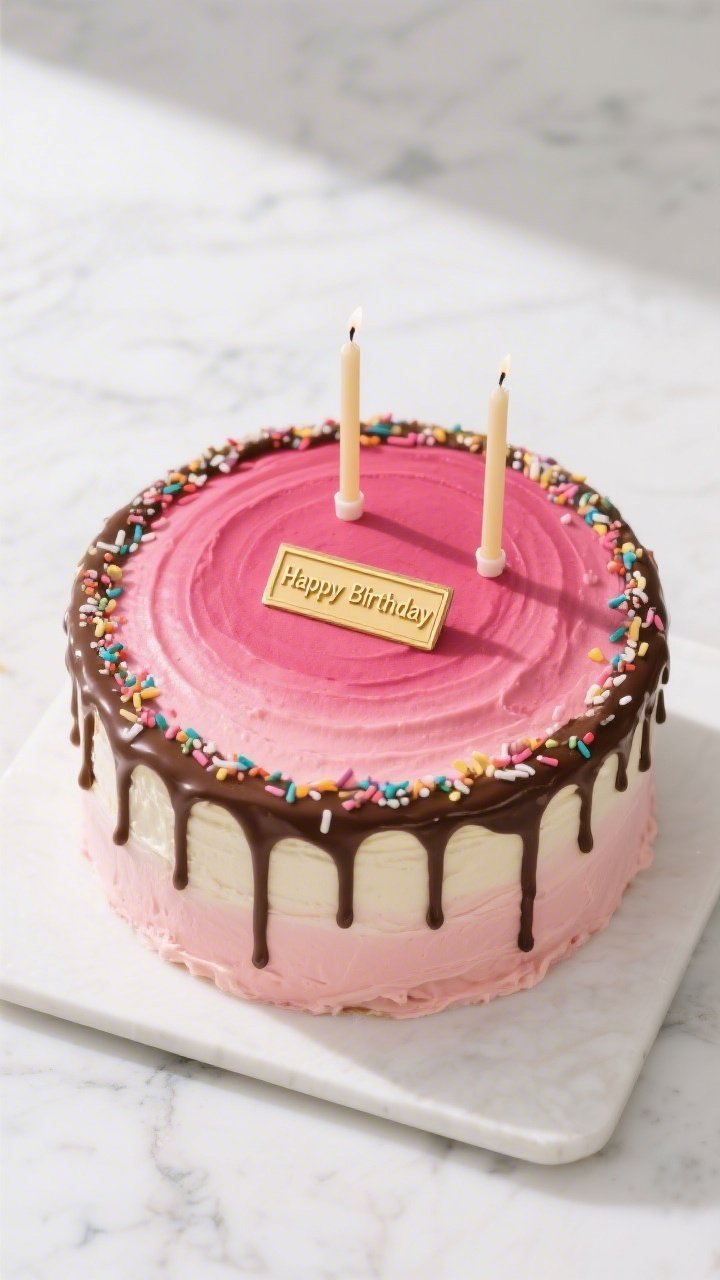
- Chocolate drip: Pour cooled ganache along the edges and let it drip down naturally.
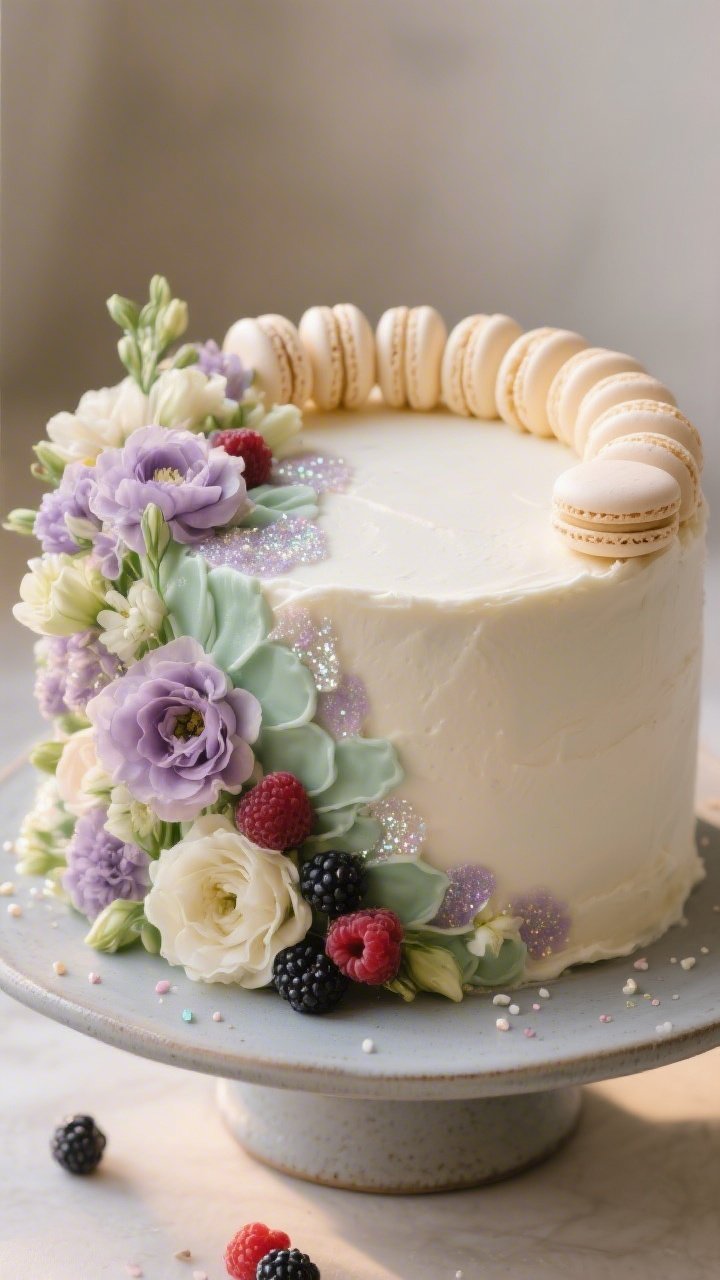
- Fresh florals: Wrap stems and use food-safe flowers. Cluster them on top or as a side cascade.
- Cookie crown: Press sandwich cookies or macarons into the top edge for a festive border.
- Top it off. Add a cake topper, candles, or a personalized plaque to finish the look.
Storage Instructions
- Short term: Keep the cake covered at cool room temperature for up to 1 day if it’s buttercream-based and not filled with perishable items.
- Refrigeration: If using fresh fruit, cream cheese frosting, or cream-based fillings, refrigerate. Bring to room temperature 1–2 hours before serving.
- Freezing: Wrap unfrosted layers tightly and freeze for up to 2 months.
Thaw in the fridge overnight before decorating.
- Transporting: Chill the finished cake well, then place in a snug cake box. Keep it flat and cool during travel.
Benefits of This Recipe
- Beginner-friendly techniques that still look impressive in photos.
- Flexible flavors and colors to match any theme or age.
- Make-ahead options to reduce day-of stress.
- Budget-conscious designs using simple tools and pantry ingredients.
- Scalable for mini cakes, sheet cakes, or tall layer cakes.
Common Mistakes to Avoid
- Skipping the chill time. Warm cake and soft frosting lead to bulging sides and messy edges.
- Overloading with toppings. Too many heavy decorations can slide or sink into soft frosting.
- Using liquid food color in buttercream. It can thin the frosting and mute colors. Choose gel colors.
- Not leveling layers. Uneven stacks make smoothing and decorating much harder.
- Pouring hot ganache. Warm drip will melt frosting and run too far.
Cool it until slightly thick.
Variations You Can Try
- Confetti Inside: Add sprinkles to vanilla batter for a funfetti look. Pair with vanilla buttercream and a sprinkle border.
- Cookies and Cream: Fold crushed chocolate sandwich cookies into frosting. Decorate with whole cookies on top.
- Strawberry Shortcake: Fill with sliced strawberries and whipped cream frosting.
Use a naked-cake finish with minimal frosting on the sides.
- Chocolate Overload: Layer chocolate cake with ganache filling, chocolate buttercream, and a drip. Add chocolate bars and truffles on top.
- Rainbow Ombre: Tint layers in gradient colors. Finish with matching ombre frosting and confetti sprinkles.
- Elegant Florals: Smooth buttercream, soft pastel palette, and a small cluster of food-safe flowers and berries.
- Theme Toppers: Add fondant stars, sports balls, dinosaurs, or a name plaque to match the party theme.
FAQ
How do I get perfectly smooth frosting?
Start with a firm, chilled crumb coat, then apply a generous final layer.
Use a warm bench scraper to smooth the sides while turning the cake on a stand. Chill again and touch up any gaps with a small spatula.
What’s the best frosting for decorating?
American buttercream is the most forgiving and holds shape well. Swiss meringue buttercream is silky and smooth but takes longer.
For sharp edges under fondant, use a stable buttercream or ganache.
How do I prevent my colors from bleeding?
Use gel colors and avoid over-hydrating frosting. Chill the cake between color applications, and keep dark colors away from very light ones if possible. Store in a cool, dry place.
Can I decorate a store-bought cake?
Yes.
Scrape and re-frost the cake with your own buttercream, or add simple upgrades like a chocolate drip, sprinkles, and a custom topper. It’s a fast way to personalize.
How far in advance can I decorate?
You can frost and decorate the cake 1 day ahead. Keep it covered and chilled, and let it sit at room temperature before serving.
Add fresh fruit or flowers the day of for best results.
Do I need special tools to make clean designs?
No. The basics—a turntable, offset spatula, bench scraper, and piping bags—go a long way. You can improvise with a large knife, a ruler, and zip-top bags in a pinch.
In Conclusion
Birthday cake designs don’t require complex skills—just a good plan and a few reliable techniques.
Keep your layers even, your frosting cool, and your decorations simple but intentional. With these ideas, you’ll make a cake that’s personal, polished, and ready for candles. Most of all, have fun with it.
A happy cake makes a happy party.
Printable Recipe Card
Want just the essential recipe details without scrolling through the article? Get our printable recipe card with just the ingredients and instructions.
Leave a Reply