Here’s the truth nobody tells you: kids don’t reject healthy food because it’s healthy. They reject it because it’s boring. Hand a child a sad pile of celery sticks and you’ll get sad results. But give them something with crunch, color, dip, or a clever name? Suddenly they’re inhaling vegetables like it’s their job.
I’ve spent years feeding picky eaters (my own and other people’s), and I’ve learned that the best kid snacks live in the sweet spot between nutritious and genuinely fun. They need to look appealing, feel like a treat, and ideally involve some kind of dipping, dunking, or assembling.
The ten recipes below are battle-tested in real kitchens with real children. They’re quick to make, packed with good stuff, and—most importantly—they actually disappear from the plate. Let’s get cooking.
1. Rainbow Veggie Pinwheels
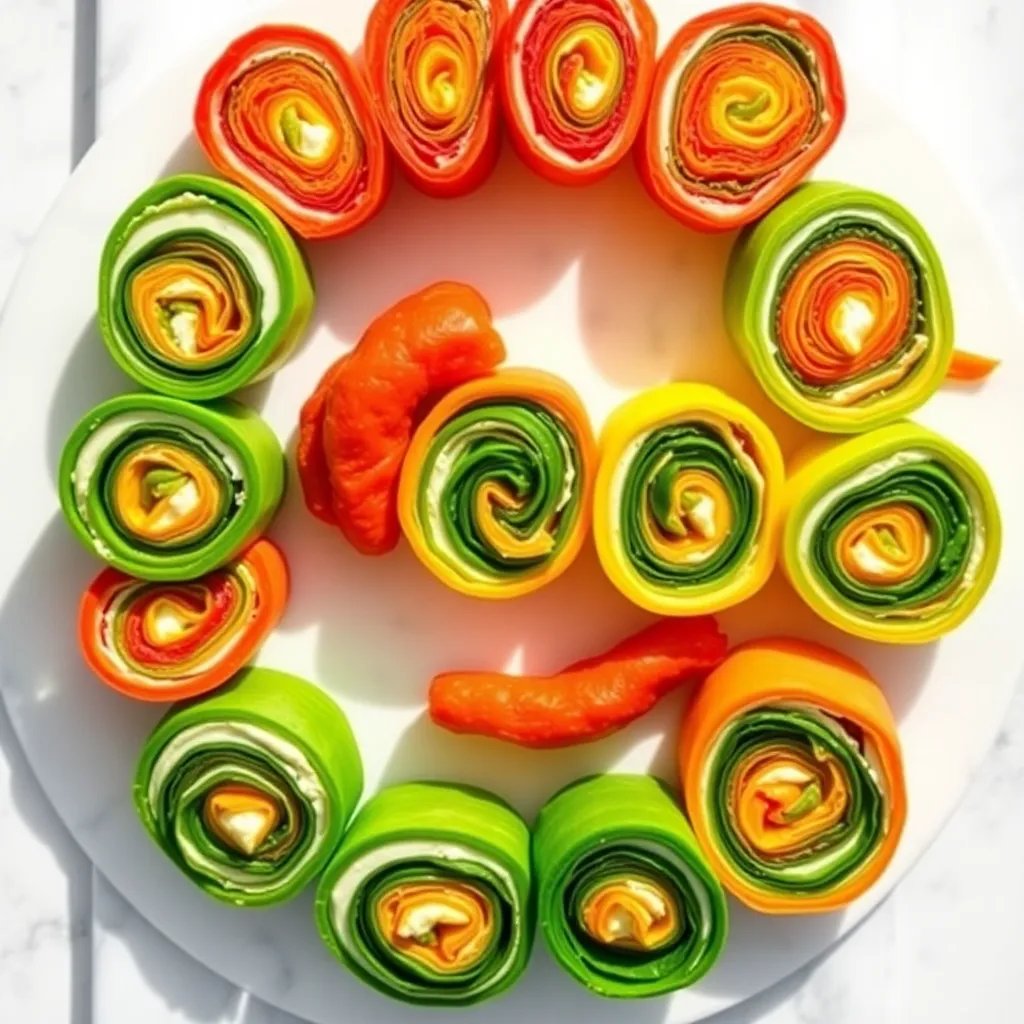
These colorful spirals look like edible art, and that’s half the battle won. The combination of creamy cheese, soft tortilla, and crunchy vegetables hits every texture a kid wants, and you can sneak in whatever produce is hiding in the crisper drawer.
Ingredients:
- 4 large whole wheat tortillas
- 1 cup whipped cream cheese
- 2 tablespoons plain Greek yogurt
- 1 medium carrot, finely grated
- 1 red bell pepper, thinly sliced
- 1 cup baby spinach leaves
- 1/2 cucumber, julienned
- 1/2 teaspoon garlic powder
- 1/4 teaspoon salt
- 1 tablespoon fresh dill, chopped
Instructions:
- In a small bowl, mix the cream cheese, Greek yogurt, garlic powder, salt, and dill until smooth and spreadable.
- Lay one tortilla flat on a clean cutting board and spread about three tablespoons of the cream cheese mixture evenly across the surface, leaving a half-inch border around the edges.
- Layer a small handful of spinach across the tortilla, followed by grated carrot, pepper strips, and cucumber arranged in horizontal rows.
- Starting from one edge, roll the tortilla up tightly into a snug log, pressing gently as you go to keep everything compact.
- Wrap the rolled tortilla in plastic wrap and refrigerate for at least 20 minutes to help it hold its shape.
- Unwrap and slice into one-inch pinwheels using a sharp serrated knife, discarding the uneven ends.
- Repeat with remaining tortillas and arrange pinwheels on a platter, cut-side up.
Make these the night before for an effortless after-school snack. Swap in turkey, hummus, or shredded rotisserie chicken for protein-packed variations.
2. Frozen Yogurt Berry Bark
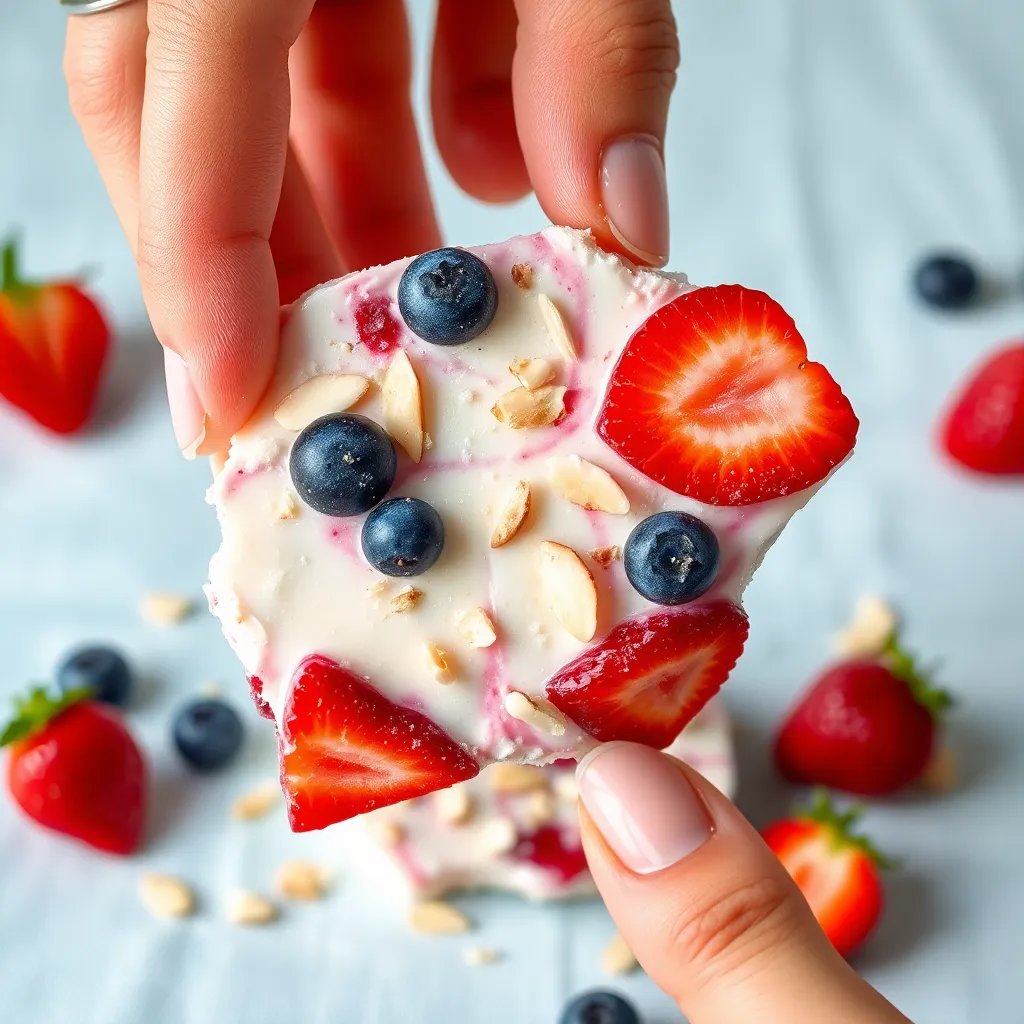
This is what happens when you turn yogurt into something that feels like a popsicle and a candy bar had a baby. It’s cold, crunchy, slightly sweet, and loaded with antioxidants—but your kids will just think they’re getting dessert for snack time.
Ingredients:
- 2 cups vanilla Greek yogurt
- 2 tablespoons honey or maple syrup
- 1 teaspoon vanilla extract
- 1/2 cup fresh strawberries, sliced
- 1/2 cup fresh blueberries
- 1/4 cup raspberries
- 2 tablespoons sliced almonds (optional)
- 2 tablespoons mini chocolate chips
- 1 tablespoon shredded coconut
Instructions:
- Line a rimmed baking sheet with parchment paper, making sure the paper extends slightly up the sides for easy lifting later.
- In a medium bowl, whisk together the yogurt, honey, and vanilla extract until completely smooth and uniform in color.
- Pour the yogurt mixture onto the prepared baking sheet and spread it evenly with an offset spatula to about a quarter-inch thickness.
- Scatter the strawberries, blueberries, and raspberries across the surface, pressing them gently into the yogurt so they stick.
- Sprinkle the almonds, chocolate chips, and coconut over the top, distributing toppings so every bite gets a mix.
- Transfer the baking sheet to the freezer and freeze for at least 4 hours, or until completely solid.
- Lift the bark from the pan using the parchment paper and break it into irregular pieces with your hands or a knife.
- Store leftover bark in a freezer bag for up to two weeks, serving directly from frozen.
Let kids customize their own section with different toppings before freezing—they’ll be way more invested in eating something they helped create.
3. Cheesy Broccoli Tots
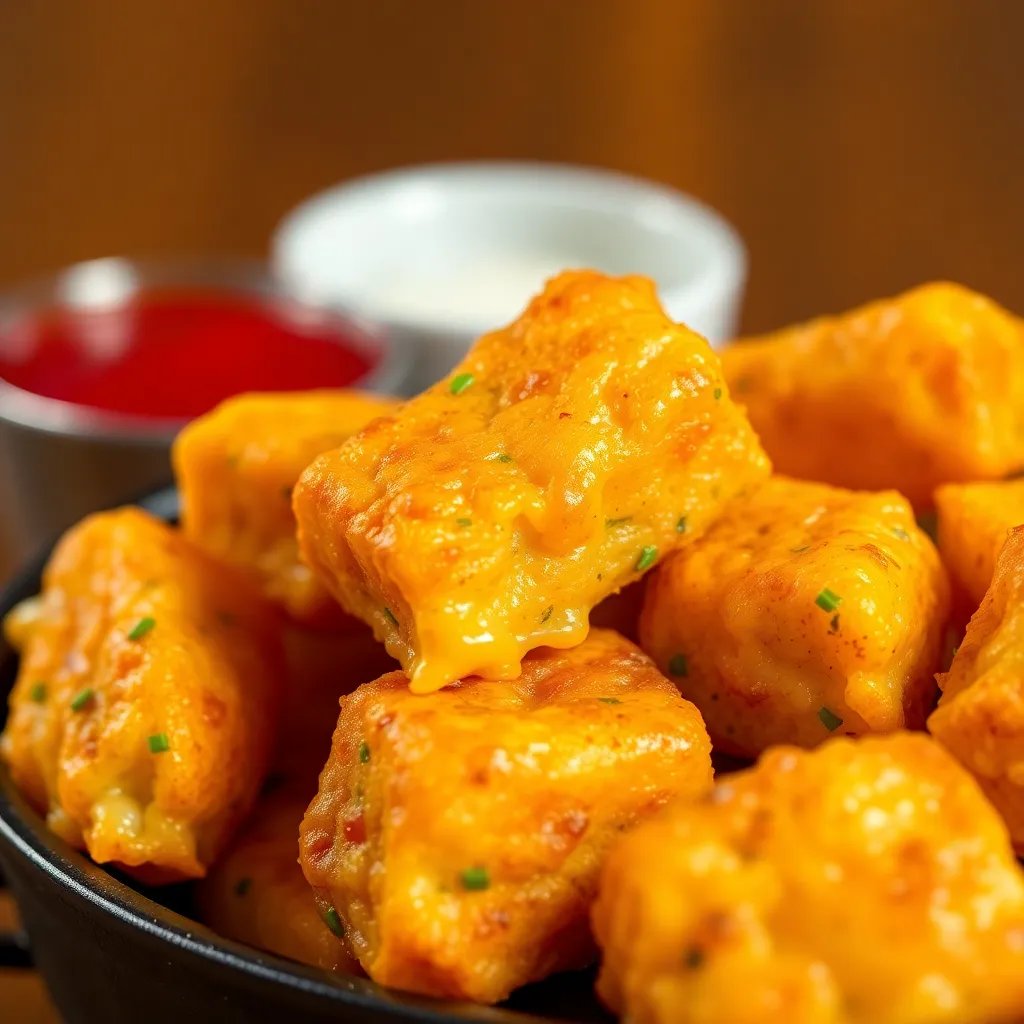
Imagine tater tots, but green and full of vegetables your kids would normally protest about. These crispy little bites are how I finally got broccoli into my pickiest eater—the cheese does most of the persuading.
Ingredients:
- 3 cups fresh broccoli florets
- 1 large egg, beaten
- 1 cup shredded sharp cheddar cheese
- 1/2 cup panko breadcrumbs
- 1/4 cup grated parmesan
- 2 tablespoons fresh chives, finely chopped
- 1 clove garlic, minced
- 1/2 teaspoon salt
- 1/4 teaspoon black pepper
- 1 tablespoon olive oil for greasing
Instructions:
- Preheat your oven to 400°F and lightly grease a baking sheet with olive oil or line it with parchment paper.
- Bring a pot of water to a boil and blanch the broccoli florets for two minutes, then immediately drain and run under cold water to stop the cooking.
- Squeeze the cooled broccoli firmly in a clean kitchen towel to remove as much moisture as possible—this is the secret to crispy tots.
- Finely chop the dried broccoli on a cutting board until it resembles coarse crumbs.
- Transfer chopped broccoli to a large bowl and add the egg, cheddar, panko, parmesan, chives, garlic, salt, and pepper.
- Mix thoroughly with your hands until the mixture holds together when squeezed.
- Scoop tablespoon-sized portions and shape into small cylinders or ovals, placing them on the prepared baking sheet with space between each.
- Bake for 18 to 20 minutes, flipping halfway through, until golden brown and crispy on all sides.
- Cool for five minutes before serving with ketchup or ranch for dipping.
These freeze beautifully after baking. Reheat from frozen in a 375°F oven for 10 minutes for instant snack success.
4. Apple Donut Sandwiches
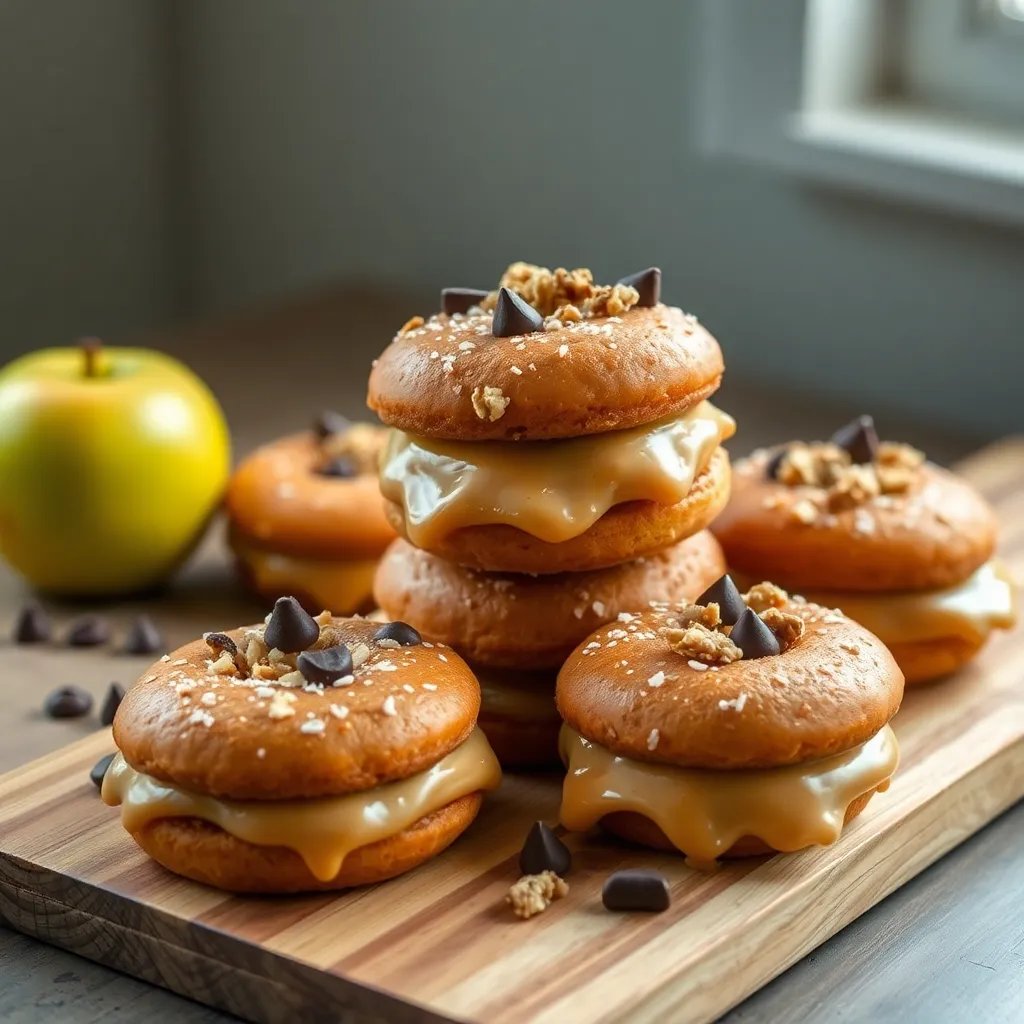
These look like donuts but they’re literally just apples. The genius is in the cross-section slice that creates a perfect ring shape, ready to be slathered with nut butter and topped with whatever crunchy goodness you have on hand.
Ingredients:
- 2 large crisp apples (Honeycrisp or Pink Lady work well)
- 1/2 cup almond butter or peanut butter
- 2 tablespoons mini chocolate chips
- 2 tablespoons granola
- 2 tablespoons shredded coconut
- 2 tablespoons chopped dried cranberries
- 2 tablespoons chia seeds or hemp hearts
- 1 tablespoon honey (optional)
- 1 teaspoon ground cinnamon
Instructions:
- Wash the apples thoroughly and pat them dry with a clean towel.
- Lay each apple on its side and slice horizontally into half-inch thick rounds, creating disk-shaped pieces.
- Use a small round cookie cutter or apple corer to remove the seedy center from each slice, creating the donut hole effect.
- Lay the apple rings on a serving platter or large plate in a single layer.
- Spread a generous tablespoon of nut butter on top of each ring, covering the surface evenly.
- Sprinkle different toppings on each ring to create variety—chocolate chips on some, granola on others, coconut and cranberries on the rest.
- Dust the finished rings lightly with cinnamon for extra warmth and aroma.
- Serve immediately, or brush apple slices with a little lemon juice first if making ahead to prevent browning.
For a fun activity, set up a topping bar and let kids decorate their own. It’s snack time and craft time in one.
5. Mini Mediterranean Hummus Cups
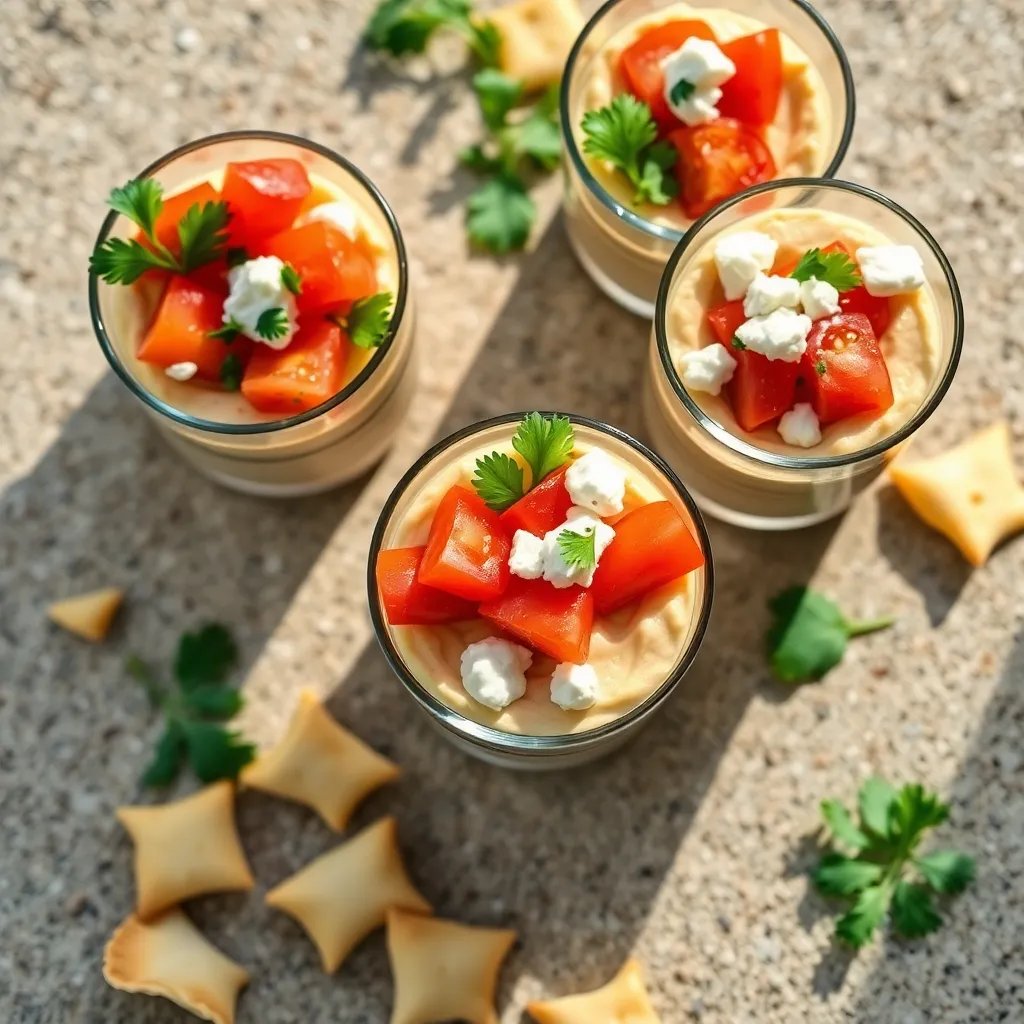
These tiny cups pack massive flavor and feel fancy enough to make kids think they’re doing something special. The combination of creamy hummus, juicy tomatoes, and crunchy cucumber introduces little palates to Mediterranean flavors in the most approachable way.
Ingredients:
- 1 cup classic hummus
- 1 small cucumber, finely diced
- 1 cup cherry tomatoes, quartered
- 1/4 cup feta cheese, crumbled
- 2 tablespoons kalamata olives, finely chopped (optional)
- 2 tablespoons fresh parsley, chopped
- 1 tablespoon olive oil
- 1 teaspoon lemon juice
- 12 mini phyllo cups or small bell pepper halves
- Pinch of salt
Instructions:
- If using phyllo cups, arrange them on a serving platter; if using bell pepper halves, hollow them out and pat dry.
- In a small bowl, toss the diced cucumber, tomatoes, olives, parsley, olive oil, lemon juice, and salt together until well combined.
- Let the vegetable mixture sit for five minutes to allow the flavors to meld and the tomatoes to release a little juice.
- Spoon about a tablespoon of hummus into the bottom of each cup, smoothing the top slightly.
- Top each hummus base with a heaping spoonful of the vegetable mixture, mounding it slightly.
- Sprinkle each cup with crumbled feta cheese for a salty, creamy finishing touch.
- Drizzle with a tiny bit more olive oil if desired and serve within an hour for best texture.
Skip the olives and feta for younger kids who prefer milder flavors. The base recipe works beautifully with any combination of finely diced veggies.
6. Banana Sushi Rolls
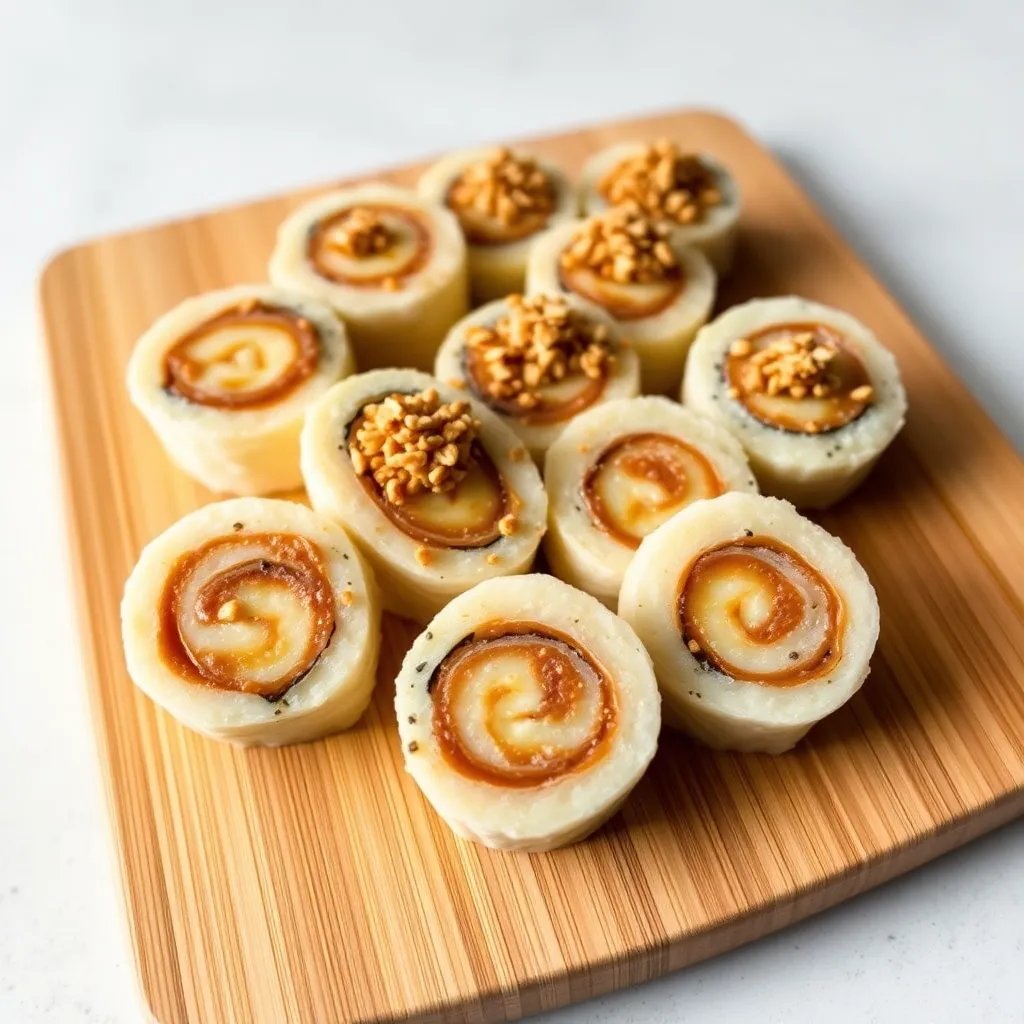
This is the snack that broke my kids’ brains in the best way. It looks like sushi, tastes like a peanut butter banana sandwich, and travels well in lunchboxes. Three ingredients, zero cooking, all wins.
Ingredients:
- 2 large whole wheat tortillas
- 3 tablespoons creamy peanut butter or sunflower seed butter
- 2 medium ripe bananas, peeled
- 2 tablespoons honey
- 1 tablespoon ground flaxseed
- 2 tablespoons granola, crushed
- 1 tablespoon mini chocolate chips
- 1/2 teaspoon ground cinnamon
Instructions:
- Lay one tortilla flat on a cutting board or clean work surface.
- Spread half the peanut butter across the entire tortilla, leaving a half-inch clean border along one edge.
- Drizzle a teaspoon of honey over the peanut butter and sprinkle with half the flaxseed and cinnamon.
- Place a whole peeled banana along the edge opposite the clean border, lined up parallel to the edge.
- Starting at the banana side, roll the tortilla tightly around the banana, tucking as you go to keep things snug.
- Press the clean edge gently to seal—the peanut butter acts as glue.
- Repeat with the second tortilla and banana, then chill both rolls in the fridge for ten minutes to firm up.
- Slice each roll into one-inch rounds using a sharp knife, wiping the blade between cuts for clean edges.
- Arrange on a plate and sprinkle with crushed granola and mini chocolate chips before serving.
For a tropical twist, swap peanut butter for coconut butter and add a thin spread of strawberry jam under the banana. Pack these in lunchboxes within a few hours of making.
7. Crispy Chickpea Crunchies
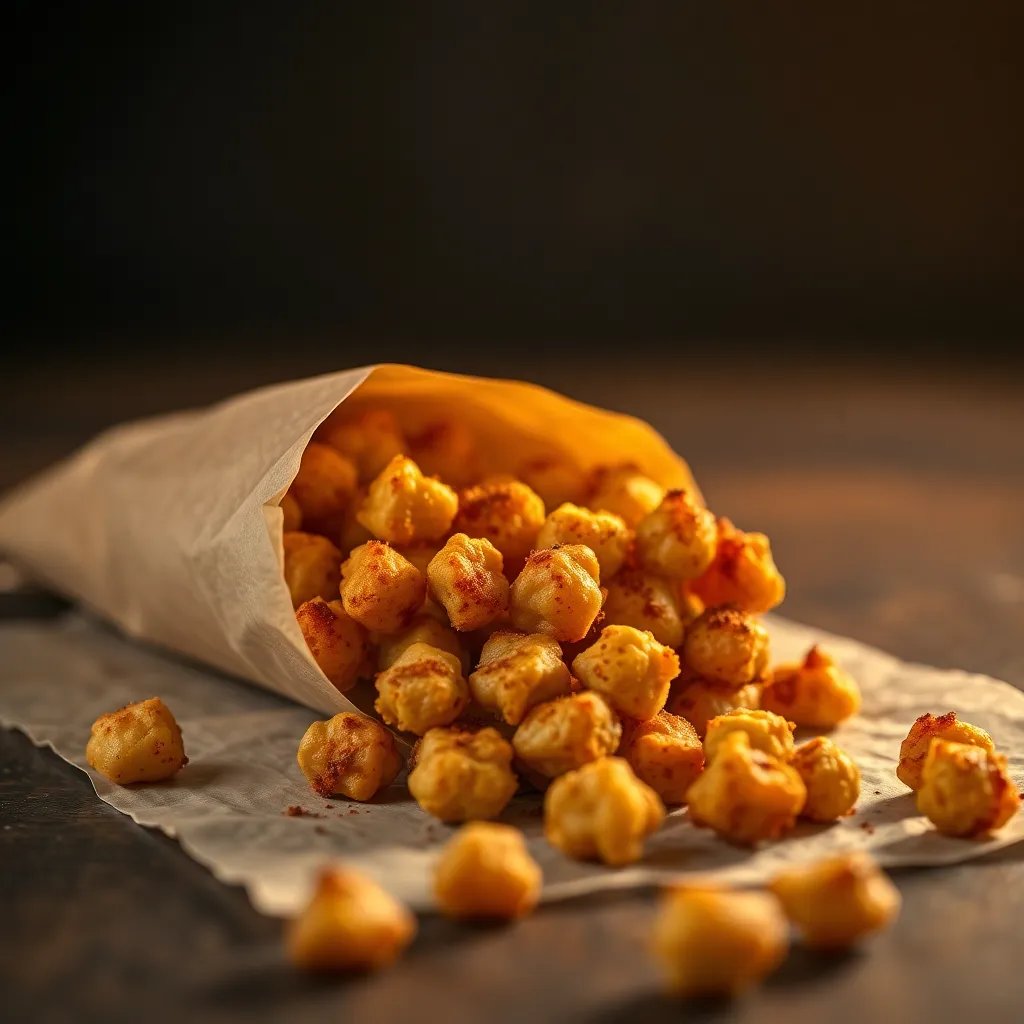
Forget store-bought chips. These roasted chickpeas are crunchy, salty, savory, and pack serious protein and fiber. Once you start eating them, it’s genuinely hard to stop, which makes them an unusually parent-approved munching snack.
Ingredients:
- 2 cans (15 oz each) chickpeas, drained and rinsed
- 2 tablespoons olive oil
- 1 teaspoon garlic powder
- 1 teaspoon smoked paprika
- 1/2 teaspoon onion powder
- 1/2 teaspoon salt
- 1/4 teaspoon black pepper
- 1/2 teaspoon dried oregano
- 2 tablespoons grated parmesan cheese (optional)
Instructions:
- Preheat your oven to 425°F and place a rack in the center position.
- Drain the chickpeas in a colander and rinse them thoroughly under cool running water until the water runs clear.
- Spread the chickpeas onto a clean kitchen towel and roll them gently to dry, removing any loose skins that come off in the process.
- Transfer the dry chickpeas to a large bowl and toss with the olive oil until evenly coated.
- Spread the oiled chickpeas in a single layer on a rimmed baking sheet, making sure none are touching.
- Roast for 25 to 30 minutes, shaking the pan every ten minutes, until the chickpeas are deeply golden and audibly crispy.
- While the chickpeas are still warm, transfer them back to the bowl and immediately toss with garlic powder, paprika, onion powder, salt, pepper, oregano, and parmesan if using.
- Spread them back on the baking sheet to cool completely before serving—they continue crisping as they cool.
Try different spice combinations like cinnamon and sugar for sweet, or ranch seasoning for a tangy variation. Store in an open jar at room temperature to maintain crunch for up to three days.
8. Peanut Butter Energy Balls
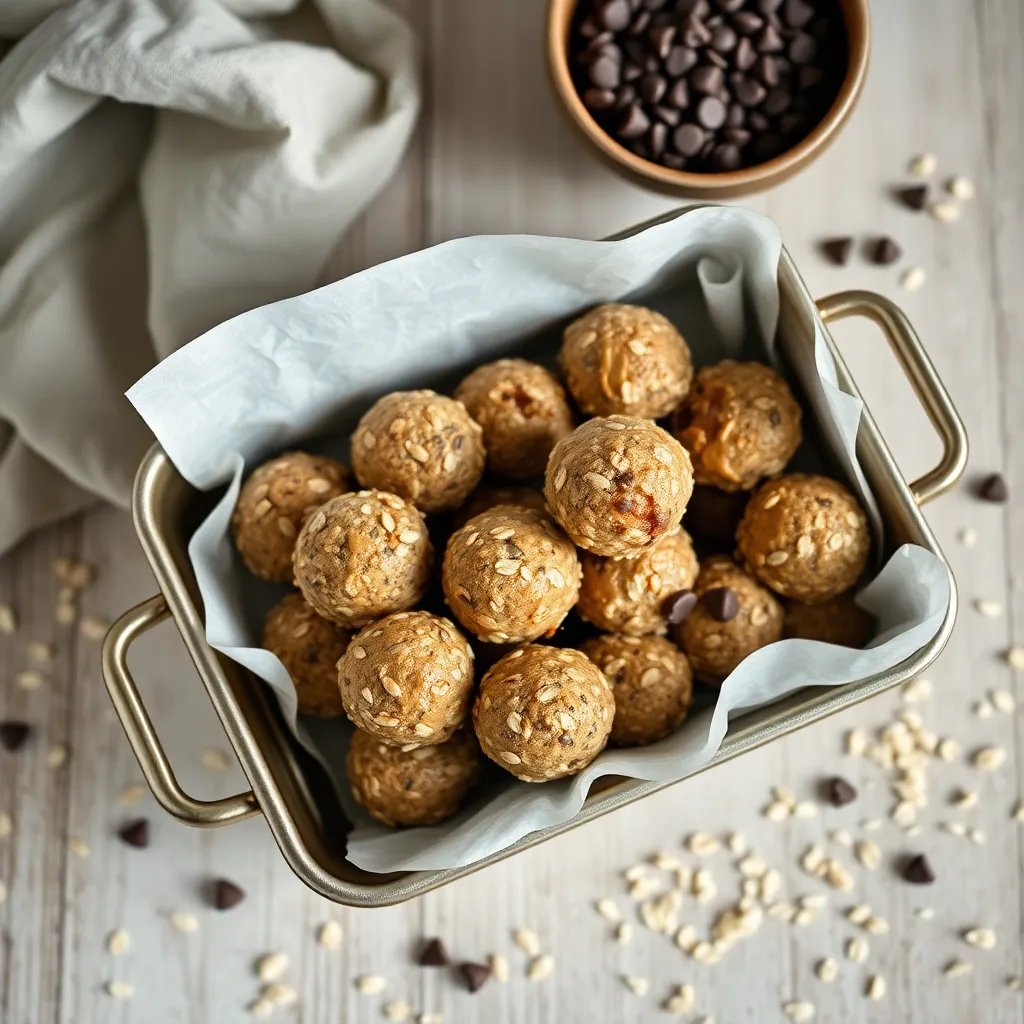
These no-bake bites are basically a chewy cookie disguised as a health food, and I’m not even sorry about it. They’re packed with oats, seeds, and just enough chocolate to make every kid in a five-mile radius come running.
Ingredients:
- 1 cup old-fashioned rolled oats
- 1/2 cup creamy peanut butter
- 1/3 cup honey or maple syrup
- 1/4 cup ground flaxseed
- 1/4 cup mini chocolate chips
- 2 tablespoons chia seeds
- 1 teaspoon vanilla extract
- 1/4 teaspoon salt
- 2 tablespoons shredded coconut (optional)
Instructions:
- Place all ingredients in a large mixing bowl, making sure the peanut butter is at room temperature for easier mixing.
- Stir everything together with a sturdy spoon or spatula, pressing the mixture against the side of the bowl to combine.
- If the mixture seems too dry to hold together, add an extra tablespoon of honey or peanut butter; if too wet, add a sprinkle more oats.
- Cover the bowl and refrigerate for 20 minutes—this firms up the mixture and makes rolling much easier.
- Using a tablespoon measure or small cookie scoop, portion out the mixture and roll between your palms into 1-inch balls.
- Place each ball on a parchment-lined plate or baking sheet as you work.
- Once all balls are rolled, refrigerate for at least 30 minutes to firm up completely.
- Transfer to an airtight container and store in the refrigerator for up to one week, or freeze for up to three months.
Get creative with mix-ins: try dried cranberries, chopped dates, or a swirl of jam. They make brilliant grab-and-go breakfasts too.
9. Cheesy Cauliflower Breadsticks
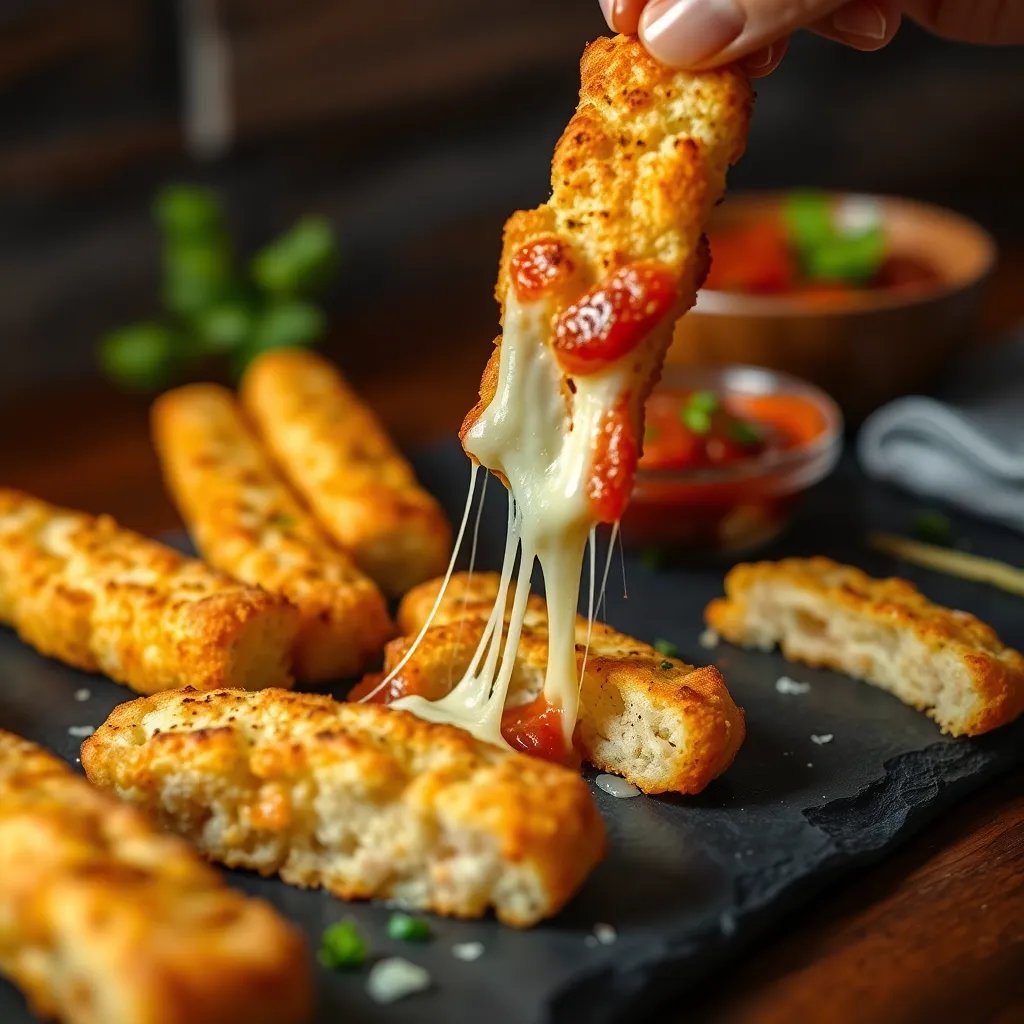
These breadsticks have a secret: there’s no bread. They’re cauliflower in disguise, and even kids who refuse to look at a vegetable will devour them dipped in marinara. The crispy cheesy edges are seriously addictive.
Ingredients:
- 1 medium head cauliflower, riced (about 4 cups)
- 2 large eggs
- 1 1/2 cups shredded mozzarella, divided
- 1/2 cup grated parmesan
- 2 cloves garlic, minced
- 1 teaspoon Italian seasoning
- 1/2 teaspoon salt
- 1/4 teaspoon black pepper
- 2 tablespoons fresh parsley, chopped
- 1/2 cup marinara sauce for dipping
Instructions:
- Preheat your oven to 425°F and line a baking sheet with parchment paper.
- If your cauliflower isn’t pre-riced, pulse florets in a food processor until they resemble fine crumbs.
- Place the riced cauliflower in a microwave-safe bowl and microwave for 5 minutes until tender, then let cool for 10 minutes.
- Transfer the cooled cauliflower to a clean kitchen towel and squeeze out as much liquid as possible—this is crucial for crispy results.
- In a large bowl, combine the dry cauliflower with eggs, 1 cup mozzarella, parmesan, garlic, Italian seasoning, salt, and pepper.
- Mix thoroughly until a thick dough forms that holds together when pressed.
- Spread the mixture onto the prepared baking sheet, shaping it into a rectangle about a half-inch thick.
- Bake for 20 minutes until the top is golden brown and the edges are crispy.
- Remove from oven, sprinkle the remaining mozzarella on top, and return to the oven for 5 more minutes until melted and bubbly.
- Sprinkle with fresh parsley, slice into breadsticks, and serve warm with marinara for dipping.
For a fun pizza variation, add mini turkey pepperoni and a drizzle of marinara before the final cheese topping. Kids love calling this “pizza for snack.”
10. Tropical Yogurt Parfait Pops
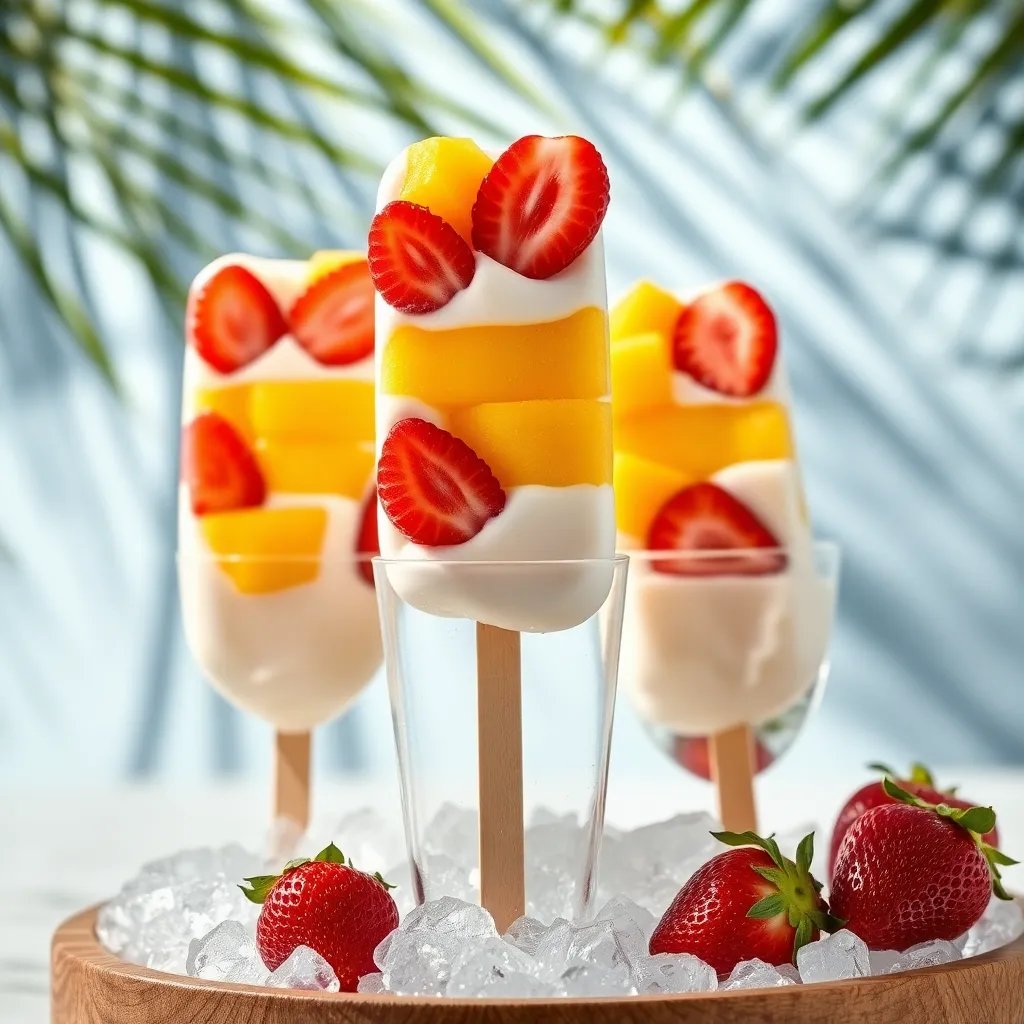
End your snack lineup with a sunshine-in-a-cup moment. These layered parfait pops look like vacation, taste like dessert, and deliver a sneaky dose of probiotics, fiber, and vitamin C. They’re particularly magical on hot afternoons after school.
Ingredients:
- 2 cups vanilla Greek yogurt
- 1 cup fresh pineapple, finely diced
- 1 cup fresh mango, finely diced
- 1/2 cup strawberries, sliced
- 1/2 cup granola
- 2 tablespoons honey
- 1 teaspoon vanilla extract
- 2 tablespoons shredded coconut
- 1 tablespoon chia seeds
- 6 small clear cups or popsicle molds
Instructions:
- In a medium bowl, whisk together the yogurt, honey, vanilla extract, and chia seeds until smooth and well combined.
- Let the yogurt mixture rest for five minutes so the chia seeds begin to plump up slightly.
- In a separate bowl, gently toss together the pineapple
This article was researched and written with AI assistance.
Printable Recipe Card
Want just the essential recipe details without scrolling through the article? Get our printable recipe card with just the ingredients and instructions.
Leave a Reply